How to Replace a Leaking Washing Machine Valve in an Outlet Box (No Solder)
Learning how to replace a leaking washing machine valve inside an outlet box will save you a $300 emergency plumber visit and stop hidden water damage dead in its tracks. There ain’t nothing quite like getting a call that water is pooling up behind the washer, but you don’t need to cut sheetrock or call in a crew to get it sorted out.
If your laundry setup has a standard plastic outlet box sitting between the studs, you don’t need a soldering torch or an expensive PEX crimper. With a couple pairs of channel locks and some thread dope, you can knock this out in about twenty minutes flat and keep your hard-earned money in your pocket.
Here is the exact step-by-step field fix I used to swap out a bad hot-water bibb without tearing the wall apart.
Tools and Parts You’ll Need
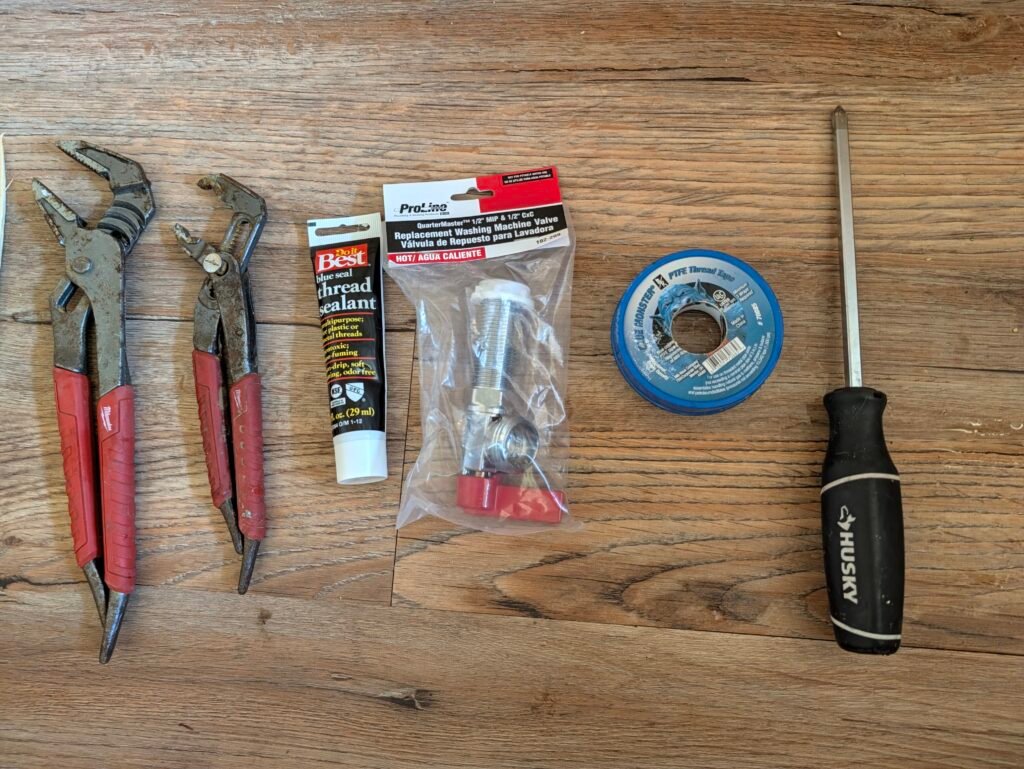
- Two Pairs of Tongue-and-Groove Pliers (Channel Locks / Milwaukee)
- Replacement Washing Machine Valve (1/2″ MIP thread, 1/4-turn ball valve like ProLine QuarterMaster)
- Blue Seal Thread Sealant (Pipe Dope)
- PTFE Thread Tape (Blue Monster or heavy-duty Teflon tape)
- Phillips Screwdriver
- Water Meter Curb Key (or a crescent wrench and pliers)
Step 1: Shut Off the Main Water at the Street
Don’t go cracking open water lines hoping a leaky valve will behave.
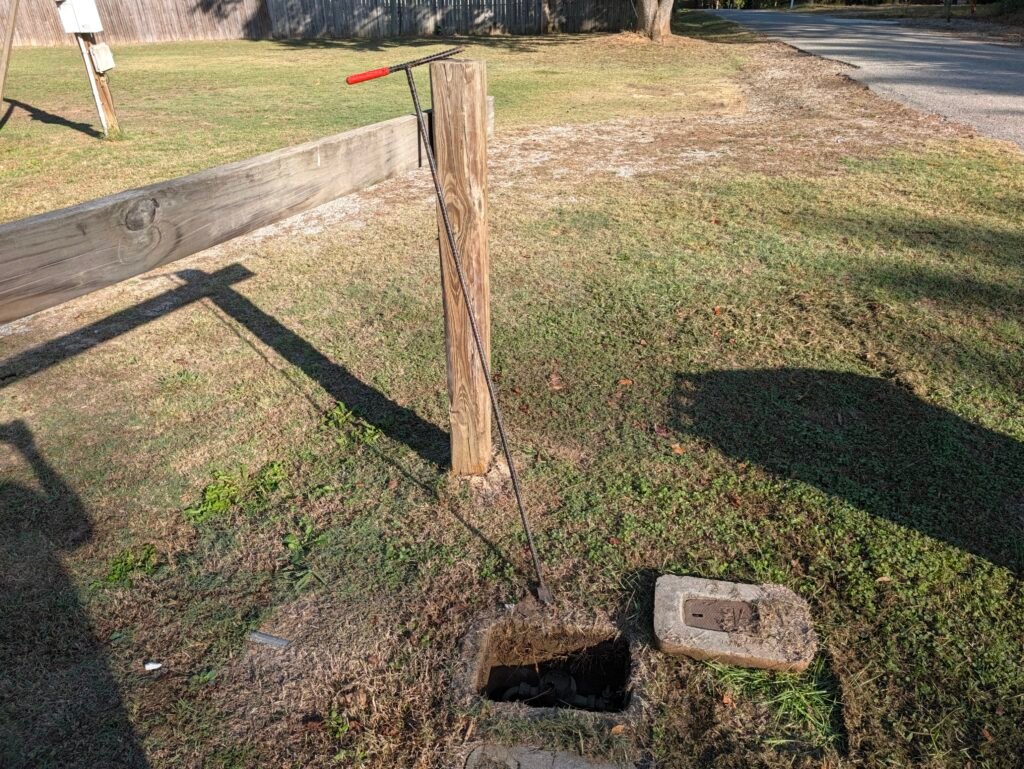
- Grab your long water key, head out to the meter box by the road, and pop the iron lid.
- Slide the key onto the brass meter stop and turn it a quarter turn until the padlock holes line up. That shuts off the whole house.
- Go inside, open up an outside hose bib or a laundry sink faucet to bleed off the line pressure, and drain the excess water out so it doesn’t soak your boots when you unthread the valve.
Step 2: Back Out the Outlet Box Trim Screws
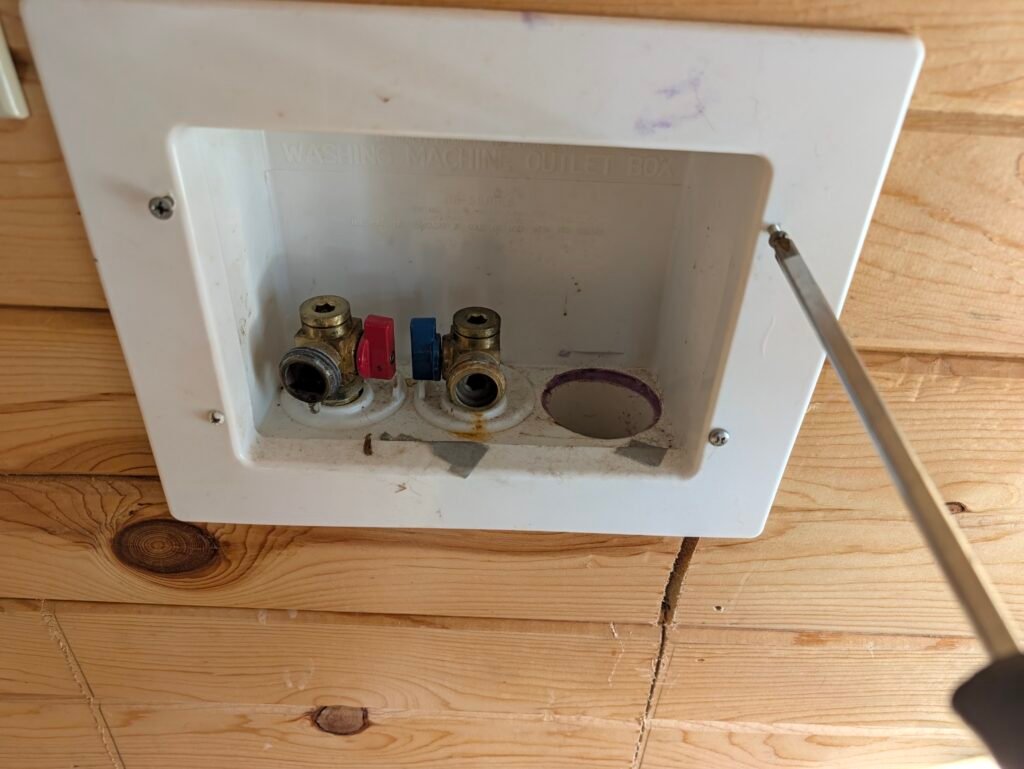
Take your Phillips screwdriver and back out the mounting screws holding the faceplate to the studs or trim work. Pop that cover off so you can see what kind of plumbing you’re dealing with underneath.
Step 3: Check Your Supply Line and Use TWO Wrenches
This right here is where most folks mess up and break plastic pipes.
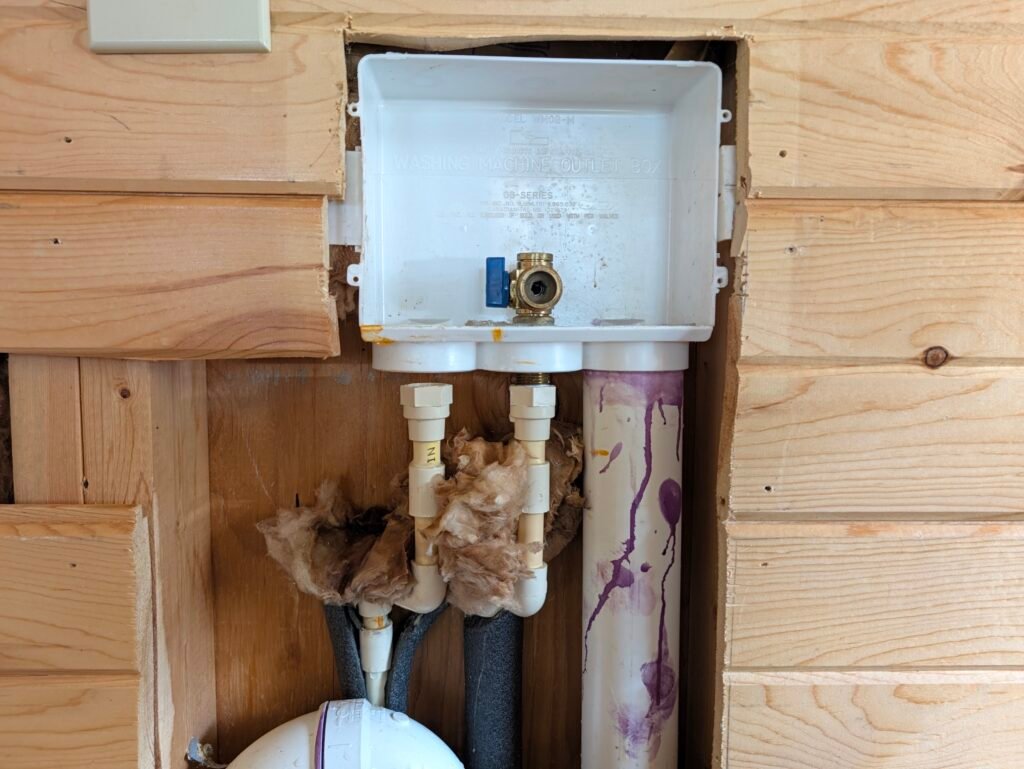
Look right below the box. In this setup, we have CPVC water lines coming up into a 1/2-inch female threaded adapter. Old CPVC pipe gets brittle as peanut brittle over time.
Tailgate Rule #1: NEVER put a wrench on that brass valve and just crank on it. If you twist that brass without holding the pipe below it, you will snap that plastic fitting right off in the wall and turn a ten-minute job into a full-blown plumbing emergency.
- Take your first pair of pliers and get a solid bite on the plastic adapter nut underneath the box to hold it dead still.
- Take your second pair of pliers on the brass valve body inside the box and turn it counter-clockwise.
- Back the old, leaking valve completely out of the threads and toss it in the scrap pile. Clean off any old, crusty tape left in the threads.
Step 4: Tape and Dope the New Quarter-Turn Valve
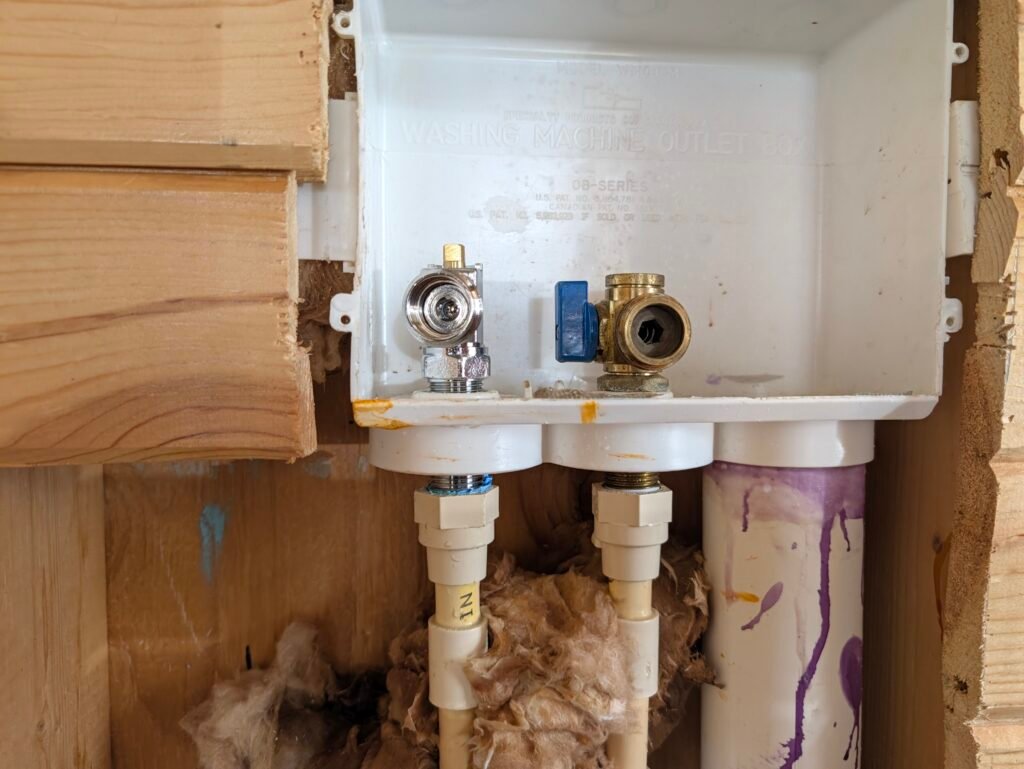
Those old multi-turn gate valves with the rubber washers love to leak around the stem packing. Replace it with a solid, 1/4-turn brass ball valve that won’t give you fits.
- Take your thread tape and wrap it clockwise around the 1/2″ male threads on the new valve about 3 to 4 times.
- Brush a light skim coat of Blue Seal pipe thread sealant right over the tape. Doing both—tape first, then dope—guarantees those threads won’t weep a single drop into your wall.
Step 5: Thread It Home and Tighten It Down
- Thread the new valve down through the hole in the bottom of the outlet box into that CPVC fitting by hand so you don’t cross-thread it.
- Get your pliers back in place: hold that bottom plastic fitting rock steady with one pair, and use the second pair to snug the new brass valve down until the hose outlet faces straight out toward you.
- Don’t go full gorilla on it—snug it up tight enough to seal that dope without cracking the plastic threads below.
Step 6: Pressurize and Check for Weeps
Head back out to the road with your meter key, turn the city water back on nice and slow, and come back inside to inspect your work.
Take a dry paper towel and wrap it around the threads below the box. Bone dry. Hook your washer hose back up, slide the trim plate back in place, and you’re good to go.
The Field Verdict
Plumbing doesn’t have to scare you to death. When you see an outlet box with threaded adapters, all you need is a $12 quarter-turn replacement valve, a little thread sealant, and the patience to hold the line with a backup wrench. You just saved yourself a $250 service call and 3 hours of downtime.
For more no-fluff rental turnover and plumbing fixes, check out how we tackled the kitchen side with our guides on replacing a kitchen faucet in 6 steps and setting up heavy-duty undermount sink clips on butcher block.
Got water dripping in the bathroom as well? Learn how to replace a shower cartridge with standard pliers before it ruins your surround.