
How to Repair Underground Copper Water Line: 10 Easy Steps
It never fails: when you head out of town for a couple of days, something will happen to one of our properties (at least to me). A wet spot in the yard had developed, which we all know is an indicator of an issue, and you could clearly see it was in line with where the main water line should be running. Once I returned home and was able to address the issue, I was thankful for that wet area because I knew right where to start digging to repair our underground copper water line.
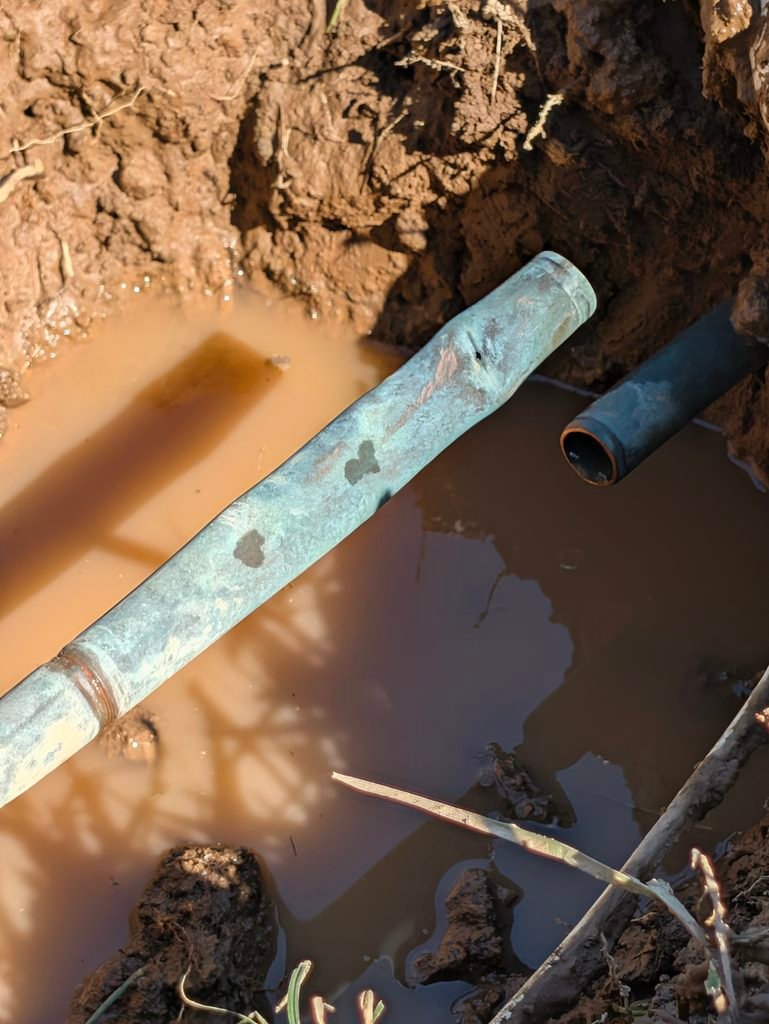
Why We Repair Underground Copper Water Line Runs with PEX
The main water service coming from the road meter was originally plumbed with soft copper. One thing that happens to buried copper over time is that it bends, ovalizes, and shifts as the ground settles or as heavy equipment and vehicles drive overhead. In our case, once we cleared the mud, I found a jagged rock resting directly against the tubing that had slowly worn a pinhole leak into the wall over years of soil pressure.
The reason for bridging this repair with PEX rather than soldering in more copper comes down to practicality. I’ll be the first to admit when I have shortcomings, and attempting to sweat copper in a wet, muddy hole is high on that list. Even if you’re skilled with a torch, residual water in an underground main acts as an endless heat sink that ruins your solder joint. Switching to PEX creates a flexible, freeze-tolerant bridge that moves with future ground settling instead of kinking or developing another rock-rub leak.
Tools & Materials Checklist
Having the right compression fittings on hand makes the job to repair underground copper water line sections much faster.
Before beginning to repair underground copper water line tubing, ensure you have the proper tools ready at the trench.
- 3/4-inch PEX Tubing: PEX-A (expansion) or PEX-B rated for direct burial potable water service (minimum 160 PSI at 73°F).
- 7/8 Inch x 3/4 Inch Lead-Free Brass Compression MIP Adapter
- SharkBite 3/4 In. x 3/4 In. FNPT Straight Brass Push-to-Connect Female Adapter
- SharkBite 3/4 Inch Coupling, Push-to-Connect Brass Plumbing Fitting
- Wheel-Type Mini Copper Tubing Cutter: Do not use a reciprocating saw; an oscillating blade will warp out-of-round soft copper further.
- 1/2 In. x 1-1/2 In. PVC Pipe Cutter
- 1/2 in. x 520 in. White PTFE Tape
- Inner/Outer Tubing Reamer & Emery Cloth: For de-burring and scouring the copper pipe wall back to clean bare metal.
- Two Adjustable Pipe Wrenches / Large Crescent Wrenches: For counter-holding compression nuts without twisting buried pipe.
- Clean Mason Sand or Pea Gravel: For bedding the pipe before backfilling rocky topsoil.
Step-by-Step Field Execution: Repairing the Underground Line
I did not know what kind of pipe I would encounter when I started this excavation—that is always the fear of the unknown with older properties. Some of this underground plumbing has probably been in the ground longer than I have. Here is how the repair went down step by step.
1. Locate the Active Leak and Clear Working Clearance
Before you can repair underground copper water line tubing, you have to dig out ample working room beneath the pipe.
I started digging right in the middle of the surface wet spot. I deliberately left the main water turned on at the meter while digging so the water pressure would expose the exact source. Once I uncovered the pipe, there was zero question: the jagged rock had worn a clear pinhole right through the copper tubing.
Once identified, I shut off the meter at the road. Next, I shoveled out several inches beneath and around the damaged section so I had clean access to wrap my tools around the pipe without fighting mud.
2. Cut the Copper Line
To remove the damaged section, I used a mini copper tubing cutter. In a tight, muddy trench where a full-sized cutter won’t swing, a mini thumb-turn cutter is invaluable. I tightened the cutting wheel a quarter-turn per revolution until the bad section parted cleanly.
3. Investigate the Line and Discover the PEX Transition
Once the cut near the hole was made, I checked the remaining pipe and noticed it had substantial play. I dug back a few inches further along the trench to see what was going on. To my surprise, a previous owner or repairman had already transitioned the line to 3/4-inch PEX just a short distance away using an older push-to-connect fitting. Having clean PEX already present made the repair plan straightforward: replace the failed section and bridge the gap with new tubing.
4. Cut Back the Existing PEX
Using a ratchet-style PVC/PEX tubing cutter, I made a clean, perfectly square cut on the existing 3/4-inch PEX line, removing the old buried fitting so I had a fresh, undamaged end to connect to.
5. Install the Brass Compression Transition on the Copper
On the copper side, I used a heavy-duty 7/8-in OD (3/4-in CTS) x 3/4-in MIP lead-free brass compression adapter:
- Unscrew the compression nut and slide the nut onto the copper pipe, followed by the brass ferrule.
- Push the fitting body over the copper until it seats firmly.
- Thread the nut back onto the fitting hand-tight.
- Using two pipe wrenches—one holding the body of the fitting to keep from twisting the buried copper, and one turning the compression nut—tighten it down until the ferrule bites firmly around the copper.
Pro-Tip: Never put Teflon tape or pipe dope on the compression threads or ferrule. Compression relies on metal-to-metal contact to seal. Tape will only prevent the nut from torquing down properly.
6. Transition to Push-to-Connect on the Copper Side
Wrap the 3/4-inch male pipe threads (MIP) of the compression adapter with several wraps of quality Teflon tape. Next, thread a 3/4-in Push-to-Connect x 3/4-in FNPT (Female) adapter onto the compression fitting. Lock your two pipe wrenches on both brass bodies and tighten them securely for a leak-proof mechanical joint.
7. Install the Coupling on the Existing PEX Side
On the other side of the trench where the existing PEX was cut square, install a new 3/4-inch Push-to-Connect brass coupling. Push firmly until you feel the pipe seat past the internal O-ring and hit the pipe stop (usually about 1 inch of insertion depth).
8. Measure, Cut, and Snap in the PEX Bridge
Measure the exact gap between the two fittings, adding enough extra length so the new pipe seats fully into both push-to-connect sockets. Cut a fresh piece of 3/4-inch PEX tubing cleanly with your shears.
- Push the new PEX firmly into the brass fitting on the copper end while bracing the copper line so it does not flex.
- Gently bow the flexible PEX slightly to line it up with the opposing coupling, then push it straight in until it snaps securely home.
9. Pressure Test Before Backfilling
Before throwing a single shovel of dirt back into the hole, walk back to the road meter and turn the main water back on. Return to the trench and inspect every joint—the compression nut, the threaded transition, and both push-to-connect collars—for any seeping under full line pressure. No water drops mean you are ready to bury.
Field Note on Direct Burial:
If you are using standard brass push-to-connect (SharkBite) fittings underground, local plumbing codes generally require them to be wrapped in specialized silicone burial wrap (such as SharkBite self-fusing silicone tape). This barrier prevents acidic soil, moisture, and minerals from corroding the brass body or collar springs over time. Full disclosure: I did not wrap the fittings on this particular emergency fix because our native soil was clean and dry, but for a strict by-the-book installation—or if you have highly corrosive, sulfurous, or acidic clay soil—take five minutes to wrap every buried brass joint before backfilling.
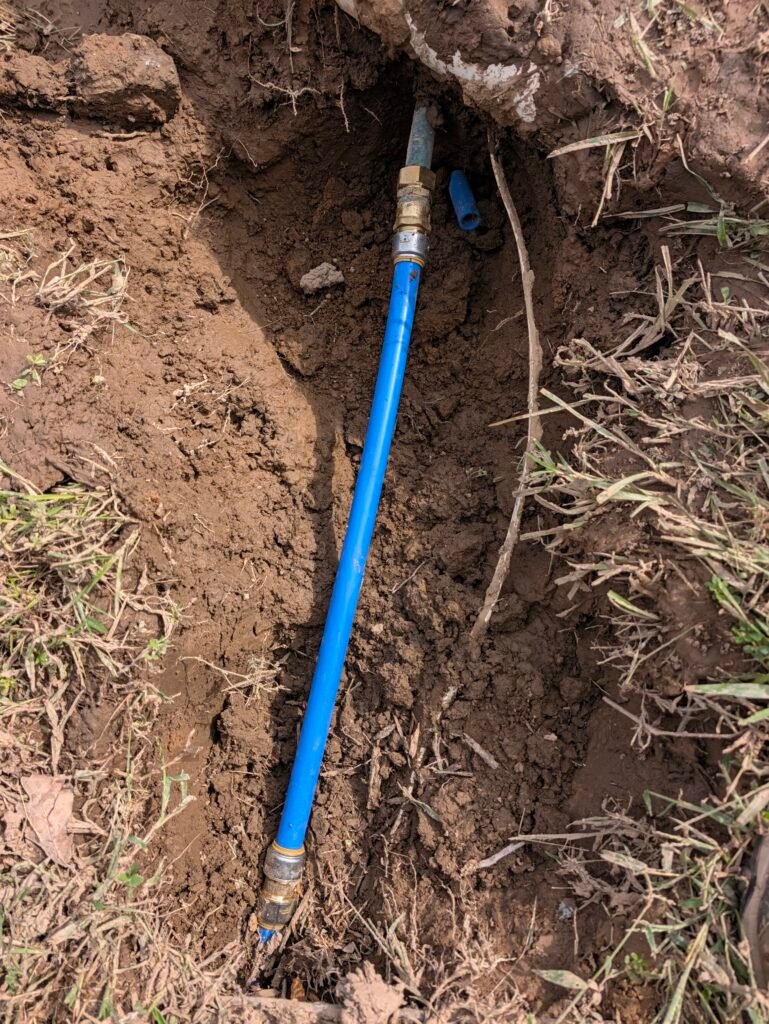
10. Bedding and Backfilling the Trench
Preventing another rock from rubbing a hole in your new pipe is just as important as the plumbing itself:
Inspect your excavated soil and remove all large rocks and sharp aggregates by hand. (If your native dirt is extremely rocky, buy a bag of clean sand to bed the pipe).
Hand-pack clean, rock-free dirt directly underneath and around the pipe to support it and prevent future ground settling.
Gently fill the remaining trench in layers, tamping lightly as you go to finish the grade.
Taking your time on bedding and mechanical joints is the key to successfully repair underground copper water line failures permanently.