How to Replace a Kitchen Sink Basket Strainer: 5 Field Steps
Getting a tenant call about a kitchen sink leaking into a cabinet subfloor is standard business in property management, which is why knowing how to replace a kitchen sink basket strainer quickly is an essential field skill. You never truly know what you’re walking into until you stick your head under the basin, but my truck is always packed with enough tools to handle whatever’s leaking.
On this particular call, the first hurdle was simply getting someone to answer the front door. After two solid rounds of knocking, I got inside.
On this particular call, the first hurdle was simply getting someone to answer the front door. After two solid rounds of knocking, I got inside.
The tenant had a plastic bowl sitting directly under the drain catching slow drips. Good start. But running the faucet wide open didn’t show a drop. Faucet streams alone don’t put enough static pressure on drain seals to reveal slow seepage. To find the source, you have to drop the stopper, fill the entire sink basin with water, and pop the plug to drop a full head of water down the pipe all at once.
Sure enough, the second that water surged, water started weeping out from the base ring. The factory seal was shot.
Learning how to replace a kitchen sink basket strainer the right way means skipping temporary tightening hacks and replacing brittle hardware before it ruins a cabinet subfloor. Here is how I knocked out this repair on-site.
Tools and Parts for the Job
You don’t need an entire plumbing van. Here is what I hauled out of my truck:
- Hammer & Long Flathead Screwdriver: For breaking loose frozen locknuts.
- 12-Inch Slip-Joint Pliers (Channel Locks): To torque down the new metal nut.
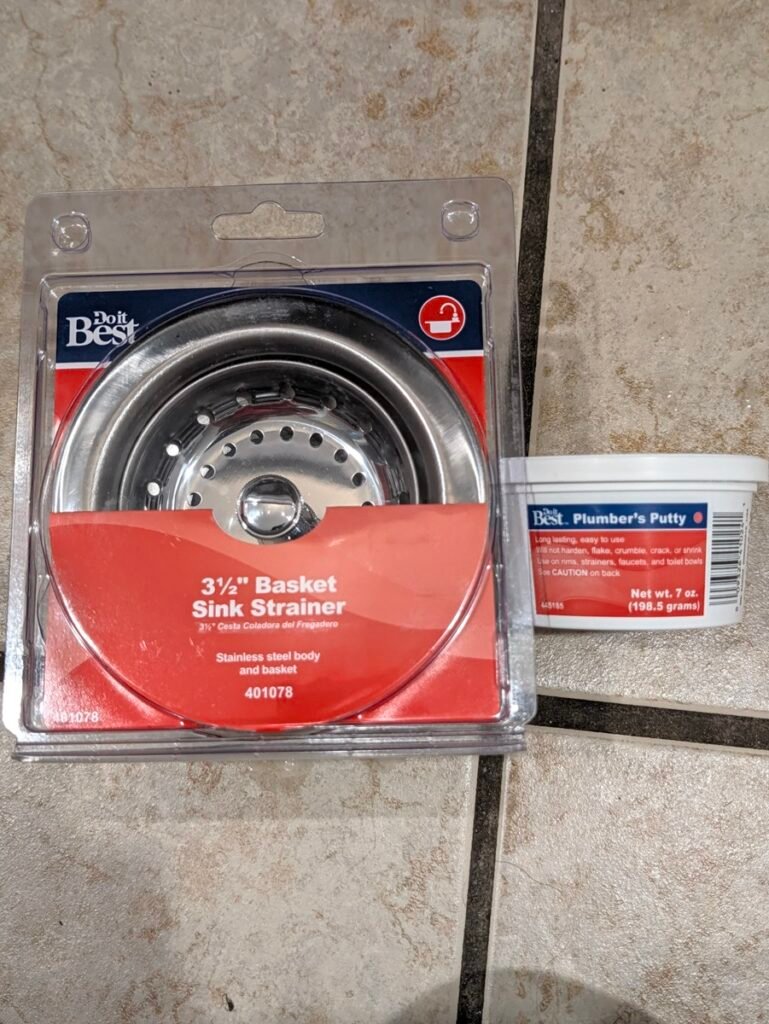
- Plumber’s Putty: For creating a watertight seal beneath the top stainless rim. (Note: standard oil-based putty works on stainless sinks, but the International Association of Certified Home Inspectors (InterNACHI) notes that oil can stain granite, marble, or composite surfaces, where neutral-cure silicone or non-staining putty is required).
- New 3-1/2 Inch Stainless Basket Strainer: Spend a couple extra dollars and get one with a metal locknut.
- Putty Knife or Plastic Scraper: To clean off the old dried seal.
- Clean Paper Towels / Rag: For wiping down stainless steel.

Step 1: Diagnosing the Leak & Breaking the Old Locknut
I initially tried to snug the old nut with my hands, but it wouldn’t budge. I grabbed my flathead screwdriver, braced the tip against the notch of the locknut ring, and tapped it lightly with my hammer.
It failed. The strike spun the entire strainer assembly inside the sink hole, tearing whatever dried plumber’s putty was left under the top flange and making the leak ten times worse.
Once that putty seal tears, tightening does nothing. You have to pull the whole unit.
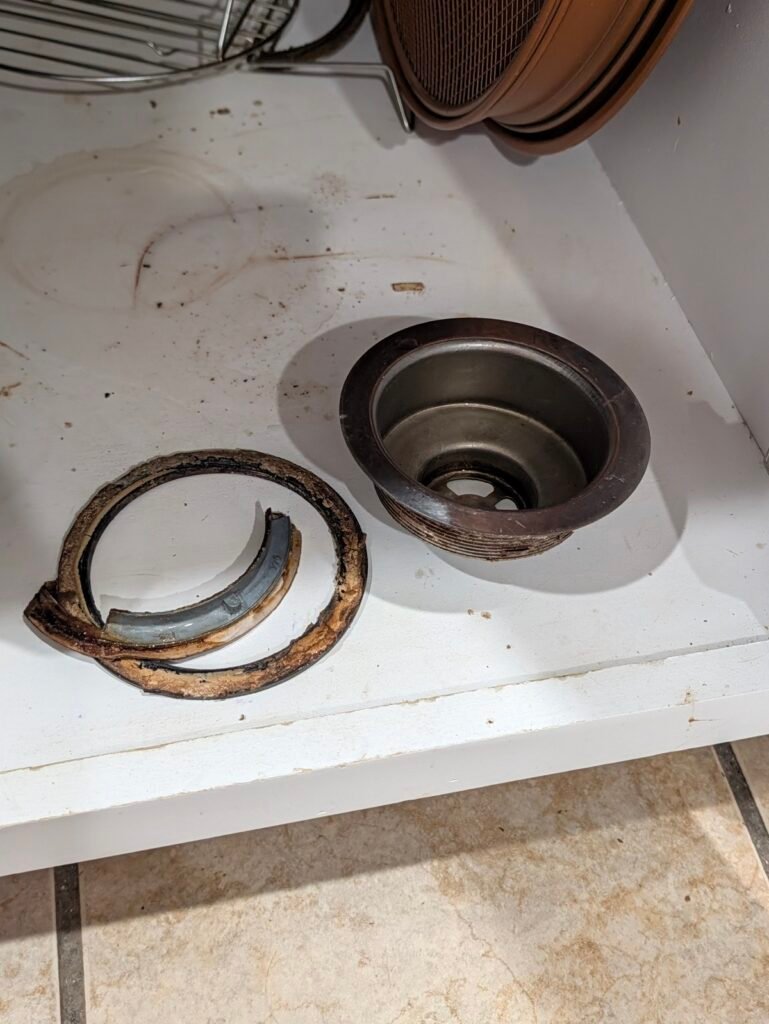
Back from the hardware store with a fresh strainer kit and fresh putty, I went back to the hammer and flat screwdriver. Two firm taps to back the nut off counterclockwise, and snap. The locknut cracked clean in half.
Looking at the broken pieces, someone had previously installed a budget strainer assembly with a cheap plastic locknut. Plastic locknuts deform under heat, turn brittle, and crack when you tap them. I don’t use plastic nuts on rental sinks for that exact reason.
Step 2: Dropping the P-Trap and Clearing the Basin
A major part of mastering how to replace a kitchen sink basket strainer is tackling the drain piping underneath before trying to pull the bowl out.
- Back off the PVC slip nut connecting the tailpiece or P-trap directly under the strainer bowl.
- Pull the P-trap clear so the bottom threads are completely exposed.
- Push the old strainer bowl up from underneath and lift it out of the sink basin.
- Take a putty knife or scraper and clean every trace of old, brittle plumber’s putty off the sink opening. If you leave crusty old putty on that stainless rim, your new seal will weep. Wipe it completely clean with a dry rag.
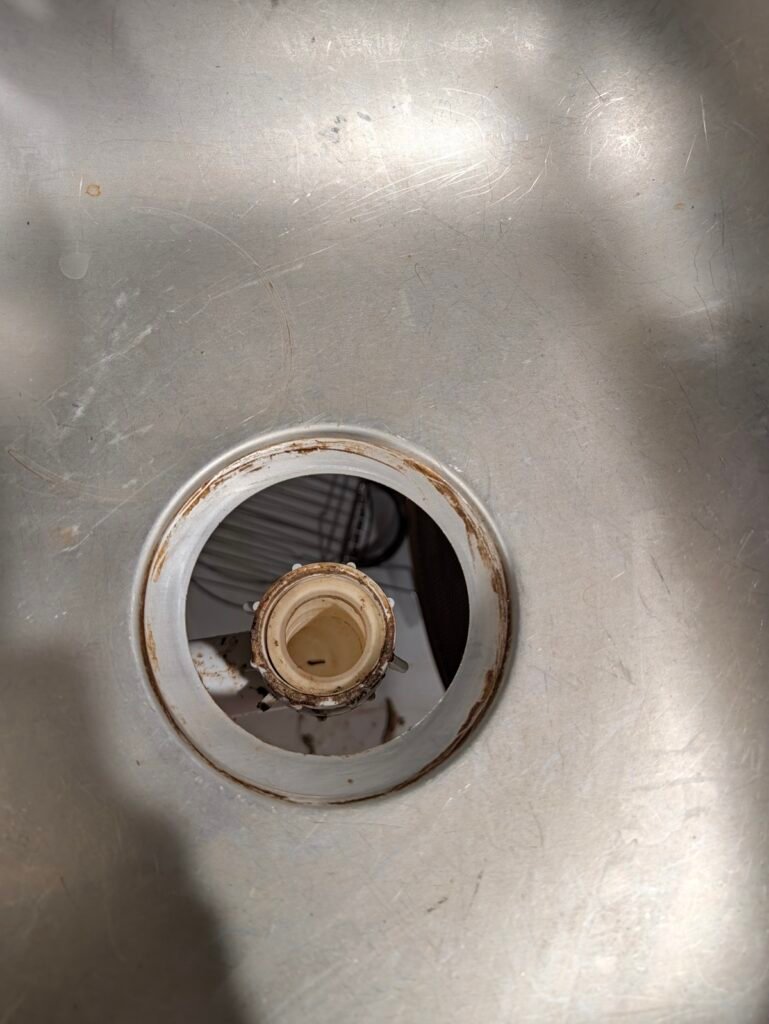
Step 3: Prepping the Plumber’s Putty Rope
Understanding how to replace a kitchen sink basket strainer comes down to how you roll your putty. Don’t grab a giant fistful or try to smear it like caulk.
- Open your tub of plumber’s putty and pull out a chunk roughly the size of a gumball.
- Roll it back and forth between your palms until you form an even rope about the thickness of a pencil.
- Press that putty rope firmly along the underside lip of the new stainless steel basket strainer.
- Work your fingers around the rim to make sure the bead is uniform with no thin gaps where water can sneak past.
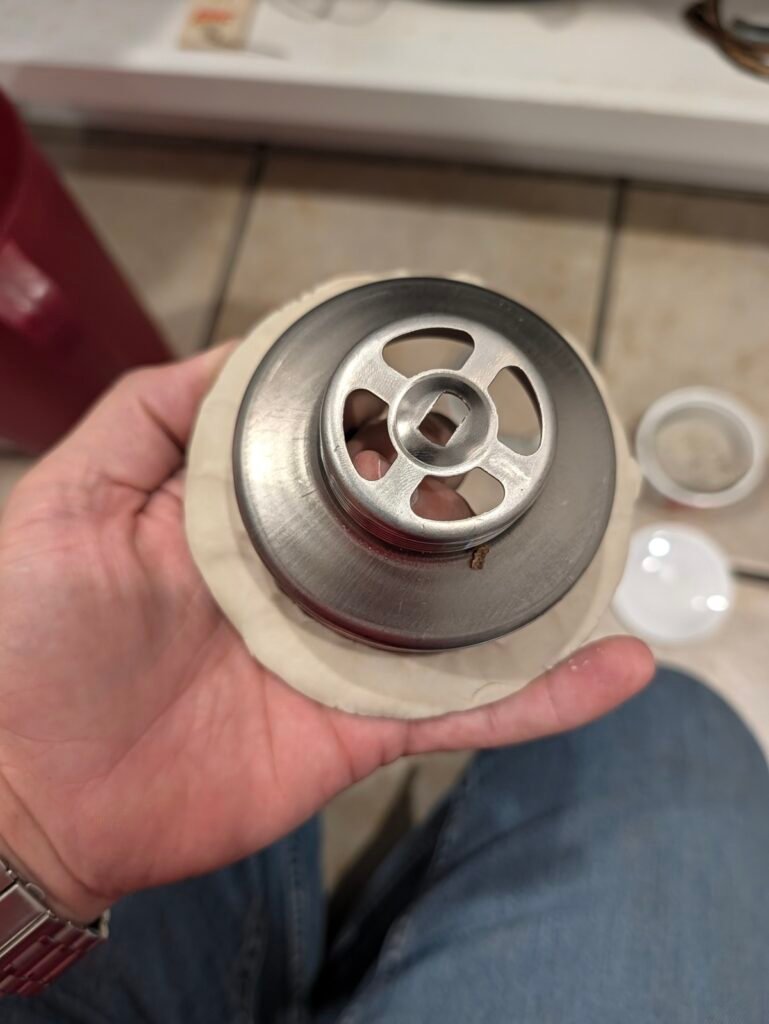
Step 4: Setting the Basket and Gasket Stack
When you learn how to replace a kitchen sink basket strainer, paying attention to the washer order beneath the sink saves you from immediate leaks. Strip off the packaging hardware.
- Drop the new strainer body straight down into the sink opening from the top.
- Press down firmly with both hands so the putty grabs the stainless basin.
- Crawl underneath the cabinet.
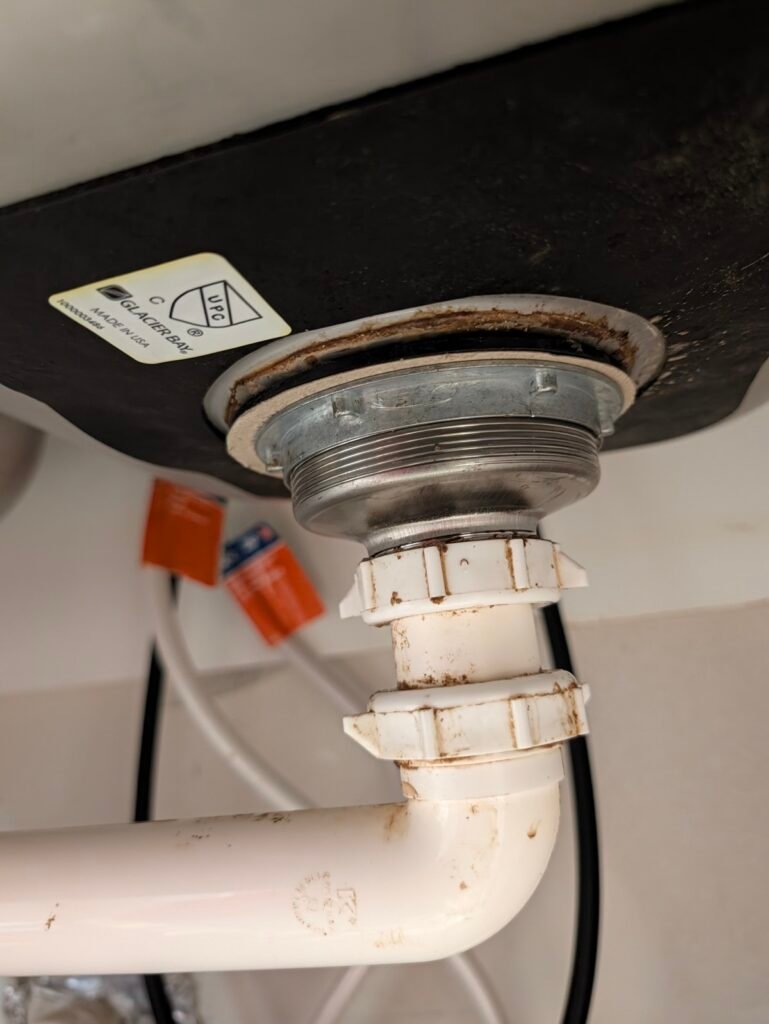
- Slide the rubber gasket up over the threads first. That rubber gasket is what seals against the bottom of the sink.
- Slide the cardboard friction washer directly underneath the rubber. Homeowners often throw that cardboard ring away thinking it’s packaging. It isn’t. It prevents the metal locknut from binding against and tearing the rubber gasket as you tighten it.
- Thread on the main metal locknut by hand until it seats flush against the cardboard washer.
Step 5: Torquing the Locknut and Reconnecting the P-Trap
Once the nut is hand-tight, grab your 12-inch pliers. Snug the locknut down an additional 1/2 to 3/4 turn.
As that metal nut clamps down, look at the rim inside the sink. You want to see an even bead of excess plumber’s putty squeeze out from beneath the outer stainless lip. That squeeze-out is your visual proof that the gasket has seated dead flat without air pockets.
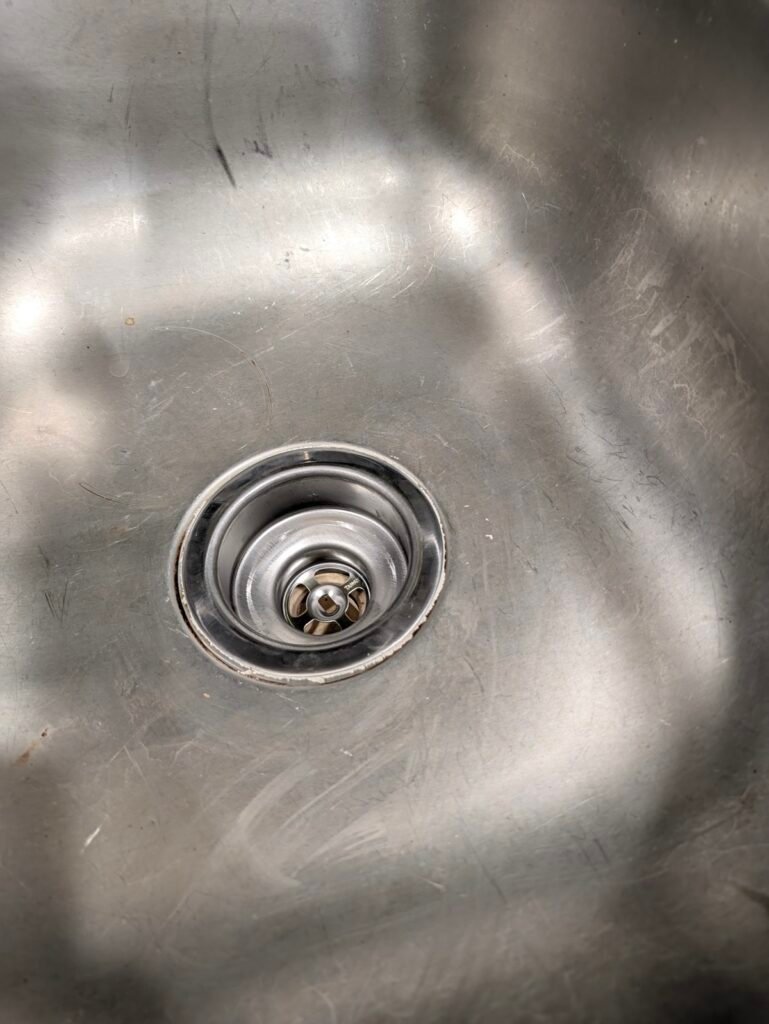
Cleaning Up and Testing:
- Run your finger along the outside of the rim to peel the squeezed-out putty away, then wipe the rim clean with a paper towel. Put the clean scrap putty right back into the container.
- Inspect your P-trap plumbing. If the existing plastic slip nut and beveled poly washer are in good shape and aligned, thread them straight onto the new strainer tailpiece. Tighten the slip nut hand-tight, plus a quarter-turn with your pliers.
- The real secret of how to replace a kitchen sink basket strainer successfully is never walking away without testing your work under pressure. Put the drain stopper in.
Field Tip: Check Drain Lines During Seasonal Walk-Throughs
Drain leaks rarely announce themselves until cabinet wood is already warping. Whenever you’re running seasonal home inspections—like reviewing our how to winterize your home checklist—always run a basin drop test on both kitchen basins. Catching a failing strainer gasket early prevents drywall cuts and subfloor rot in the unit below.