
How to Patch Drywall Holes: Proven Field Methods for Landlords
Every time a tenant moves out and I walk the rooms with a clipboard, I already know where I am going to find the damage. Behind the bathroom door. Behind the kids’ bedroom door. Someone kicked a door open without a baseboard bumper installed, and the knob punched straight through the gypsum core.
Learning how to patch drywall holes cleanly and fast is one of those skills that separates seasoned property managers from guys who lose entire security deposits paying emergency handymen.
Forget those flimsy metal mesh sticker patches you see hanging on the spinning racks at the hardware store. They sit proud of the finished surface, leave a noticeable hump when you roll paint over them, and if someone leans on that exact spot six months later, the whole repair caves straight back in.
If you want a patch that disappears under a coat of satin paint and actually holds up to daily abuse, you only need two proven methods: the California blowout patch for doorknob-sized holes, and a solid wood backer for anything larger. Here is how I run these repairs on turnover days.
Essential Tools for How to Patch Drywall Holes
You don’t need a trailer full of tools. Keep these in a clean 5-gallon bucket in your truck:
- Scrap Drywall: Matching the wall thickness. Most residential interior walls are 1/2-inch; commercial partitions or fire-rated garage walls are 5/8-inch. Never mix them up.
- Utility Knife & Keyhole Saw: For squaring up the edges.
- Joint Compound: Pick up a bag of setting-type compound (Easy Sand 20 or 45). Do not use standard pre-mixed bucket mud for your initial bed coat unless you enjoy sitting on an overturned bucket watching mud dry for 18 hours.
- Taping Knives: A stiff 6-inch knife for packing and a flexible 10-inch or 12-inch knife for feathering edges.
- 1-1/4″ Coarse-Thread Drywall Screws: For securing backer boards.
- Scrap 1×2 or 1×3 Furring Strips: 8 to 10 inches long.
- Sanding Sponge: Medium/fine grit.
Method 1: The “California Patch” (Best for 2″ to 5″ Knob Holes)
If you want to know how to patch drywall holes without leaving wide, unsightly humps on the wall, the blowout patch is the trade standard for smaller voids. When deciding how to patch drywall holes left by door hardware, the California blowout patch is the cleanest option. The California patch—also called a blowout patch—uses the face paper of the drywall scrap itself as your tape. It creates a self-supported, flush patch without adding thick layers of paper tape that you have to feather three feet out.
Step 1: Clean and Square the Damage
Never try to patch over crumbly, fractured gypsum. Take your utility knife or keyhole saw and score a rough square around the doorknob dent. Cut out the crushed material.
Reach inside the wall cavity and check for loose electrical wiring running to adjacent switches. Slice away any torn paper fuzz around the perimeter of the hole so nothing sticks out past the drywall face.
Step 2: Cut Your Drywall Plug with Paper Wings
Grab your scrap piece of 1/2-inch drywall.
- Measure the hole you just cut. Say it’s 3×3 inches.
- Cut a square of scrap drywall that is 2 inches larger in both directions (5×5 inches).
- Turn the scrap piece face-down on your tailgate or workbench.
- Score the back paper 1 inch in from each of the four edges.
- Snap the gypsum core along your scores, then carefully peel the plaster away from the front paper without tearing it.
You should be left with a solid 3×3-inch drywall core centered in the middle of a continuous 5×5-inch square of front paper. That paper margin is your built-in tape.
Step 3: Bed the Patch in Quick-Set Mud
Mix a small batch of Easy Sand 20 in a mud pan to the consistency of smooth peanut butter. Butter the edges of your wall opening and run a thin skim around the perimeter on the exterior paint.
Push the gypsum core directly into the hole. The paper collar will lay flat against the wall. Take your 6-inch taping knife, hold the center of the patch steady with two fingers, and pull the knife firmly across the paper wings to squeeze out excess mud from underneath. Bed it down tight. If you leave air bubbles under that paper, you’ll fight blisters later.
Method 2: The Wood Backer Patch (Best for Holes 6″ and Larger)
For blowouts larger than five inches, understanding how to patch drywall holes with structural wood blocking will keep the repair from flexing when future impacts occur. When someone kicks a wall or a piece of heavy furniture puts a crater between two wall studs, a paper patch won’t cut it. You need structural backing.
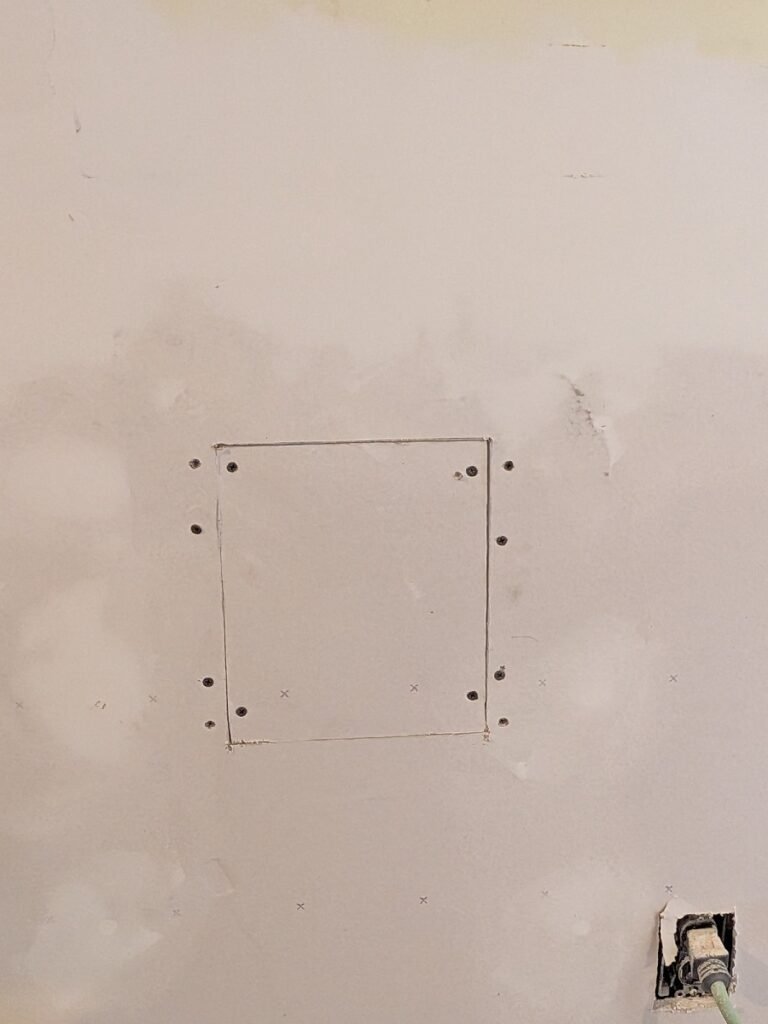
Step 1: Cut to the Clean Void
Cut your opening into a clean, level rectangle using your jab saw. Keep the opening within the stud bay.
Step 2: Lock in Your Cleats
Take a piece of 1×2 or 1×3 pine cut roughly 4 inches longer than your cutout. Slip it into the hole vertically. Hold the center with your hand while you drive a 1-1/4-inch drywall screw through the existing, undamaged drywall into the top and bottom of the wood cleat.
Sink the screw heads just below the paper surface without tearing through the face. That strip of pine is now your bridge. For holes wider than 6 inches, put two cleats in—one on each side.
Step 3: Screw the New Board to the Cleat
Cut a fresh piece of drywall to match your squared hole within an 1/8-inch tolerance. Press it in flush against the wood backing and run two screws through the patch directly into the center of the cleat.
Now you have a solid, rock-hard backing that won’t flex when the wall moves.
Mudding, Feathering, and the “Touch Test”
This is where most DIYers get impatient and make a mess. Mudding isn’t about slapping material on thick; it’s about wide, paper-thin transitions.
- The First Coat (Filling the Voids):If you used the backer-board method, lay self-adhesive fiberglass mesh tape over all four seams. Press your setting compound deep into the gaps with your 6-inch knife. Wipe it tight. Let it cure rock-hard (roughly 30 to 45 minutes for Easy Sand).
- The Second Coat (Feathering Out):A critical step in how to patch drywall holes like a professional is using a wide 10-inch or 12-inch taping knife to feather the joint compound well past the original seam. Grab your 10-inch or 12-inch knife. Lay down a thin coat that extends 4 to 6 inches beyond the edge of the patch. Angle the knife so you put pressure on the outer edge, tapering the mud down to zero thickness against the existing painted wall.
- The Sanding and Touch Test:Once the final coat turns chalky white, don’t attack it with coarse sandpaper. Take a fine sanding sponge and hit the edges first. Close your eyes and run your bare palm across the repair. Your fingertips can feel a 1/32-inch ridge long before your eyes can spot it under overhead lighting. If you feel a ridge, feather it down.
Prime Before You Paint (The Non-Negotiable Step)
Raw joint compound is basically dry gypsum sponge. If you roll wall paint straight over fresh mud, the compound will suck the moisture and binder out of the paint instantly.
The result? A dull, flat spot known as “flashing” that stands out like a sore thumb every time afternoon sunlight hits the room.
Roll one quick coat of PVA drywall primer (or a quality stain-blocking latex primer) over the patched area. Let it dry 30 minutes, then roll your matching wall color. Two coats of topcoat, and the repair is invisible.
Preventative Field Tip: Stop It from Happening Twice
Master the process of how to patch drywall holes once, but take two minutes to install physical stops so you don’t have to repeat the repair on the next turnover.
Before you pack your tools and hand over the keys to the next tenant:
- Install a rigid spring door stop onto the baseboard behind the swing path. Much like inspecting sweeps and seals when you work through our guide on how to winterize your home, taking two minutes to check door stops prevents repeat structural damage.
- If the baseboard is too low or missing backing, stick an expanded rubber wall bumper disc directly onto the freshly painted patch right where the doorknob makes contact.
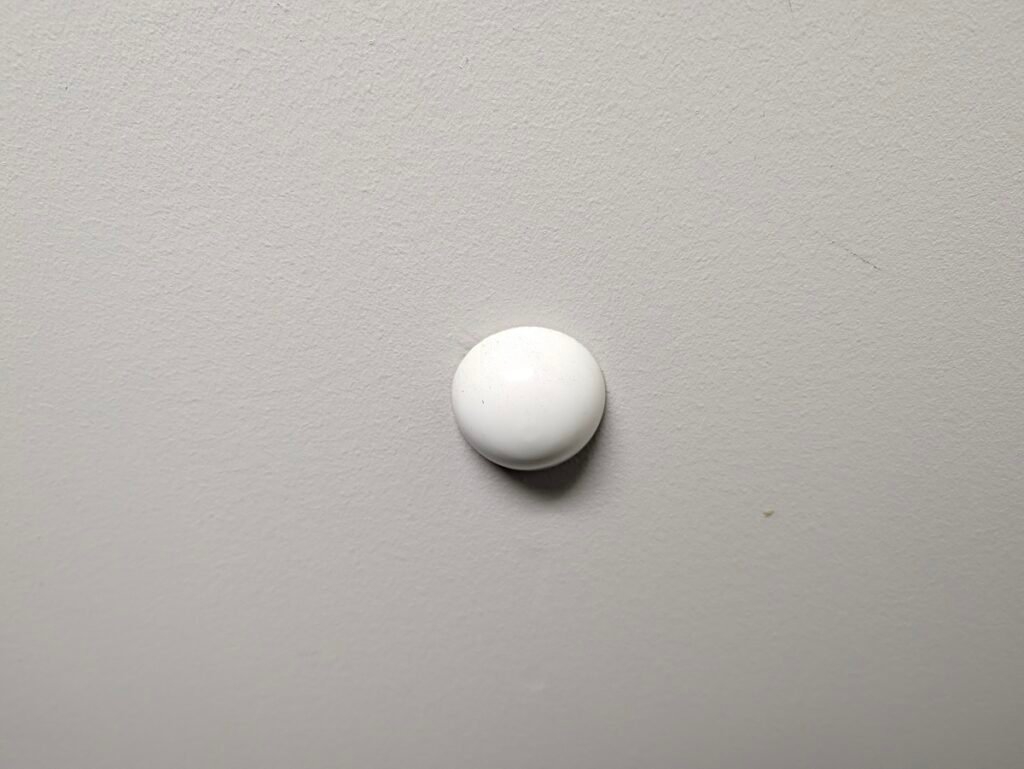
A $2 bumper saves you 45 minutes of drywall surgery the next time a door gets kicked wide open.