How to Replace a Kitchen Faucet: 6 Easy Steps (Best Guide)
As a landlord or homeowner, you never know what kind of plumbing surprise you’ll walk into. I recently took a call from a tenant stating that zero water was coming out of their kitchen sink.
When you encounter a completely dead faucet, you always verify the problem first before buying parts. I started by shutting off the angle stops, removing the internal faucet cartridge, and checking for mineral scale or debris blockages. Finding no blockage inside the cartridge, the diagnostic was clear: internal valve failure. The fastest, most cost-effective fix was to completely replace a kitchen faucet with a durable single-handle unit.
Whether you are managing rental turns or updating your personal home, here is the field-tested method to replace a kitchen faucet cleanly without unnecessary plumbing calls.
Tools and Materials Needed
- New Kitchen Faucet Kit (Single-handle with escutcheon deck plate and pull-down sprayer)
- #2 Phillips Screwdriver
- Small Slip-Joint Pliers or Adjustable Wrench
- Ratcheting PVC Cutters (Field hack for seized quick-connect clips)
- Bucket & Rag (For residual line drainage)
Step 1: Step 1: Shut Off Water Supply Lines to Replace a Kitchen Faucet
Before loosening hardware, turn off the hot and cold water shut-off valves under the sink inside the base cabinet. Turn the handles clockwise until they seat completely.
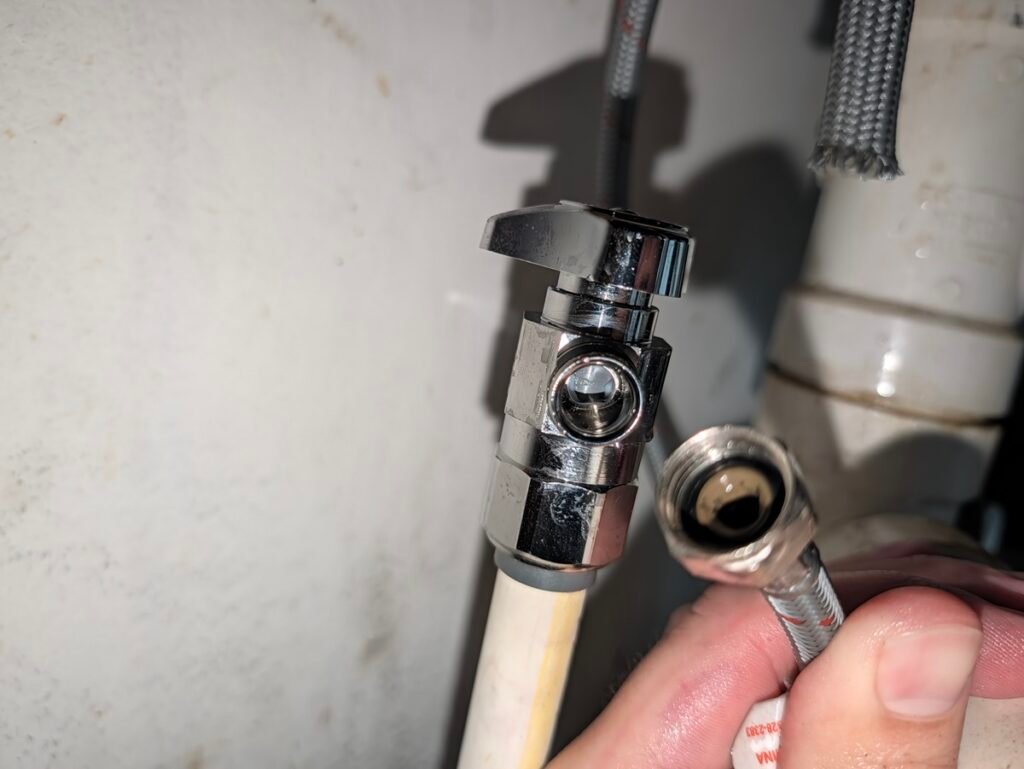
Caption: Always support the valve body so you do not twist or crimp the riser line when breaking the nut loose.
- Place a small container or rag under the valves to catch standing water.
- Carefully back off the supply line nuts using a small set of pliers.
- Field Tip: Be extremely careful not to twist the shut-off valve on its water pipe. If your valve is attached to PEX or copper tubing, twisting the body can crack the joint or crimp the pipe. Once broken loose, spin the nuts off by hand.
Step 2: Remove the Old Mounting Hardware (And Dealing with Stuck Clips)
Most older pull-out sprayers use plastic quick-connect clips that seize from age and mineral deposits. If the plastic release collar on the pull-down hose refuses to unclip, don’t waste twenty minutes fighting in an awkward cabinet:
- The Landlord Workaround: If you are discarding the old fixture entirely, simply snip the flexible sprayer line using a pair of ratcheting PVC cutters.
- Once the sprayer hose is severed, locate the retaining plate underneath the deck.
- Use a #2 Phillips screwdriver to back off the pressure bolts holding the mounting collar against the bottom of the sink.
- Move back above the counter and gently pull the old faucet body straight up, guiding the supply lines and severed hoses through the sink hole. Wipe away any old grime or mineral crust left behind on the stainless deck.
Step 3: Install the Escutcheon Deck Plate
Most standard stainless drop-in sinks feature a three-hole or four-hole pattern. If your new faucet is a single-post unit, you will use an escutcheon deck plate to bridge the gap.
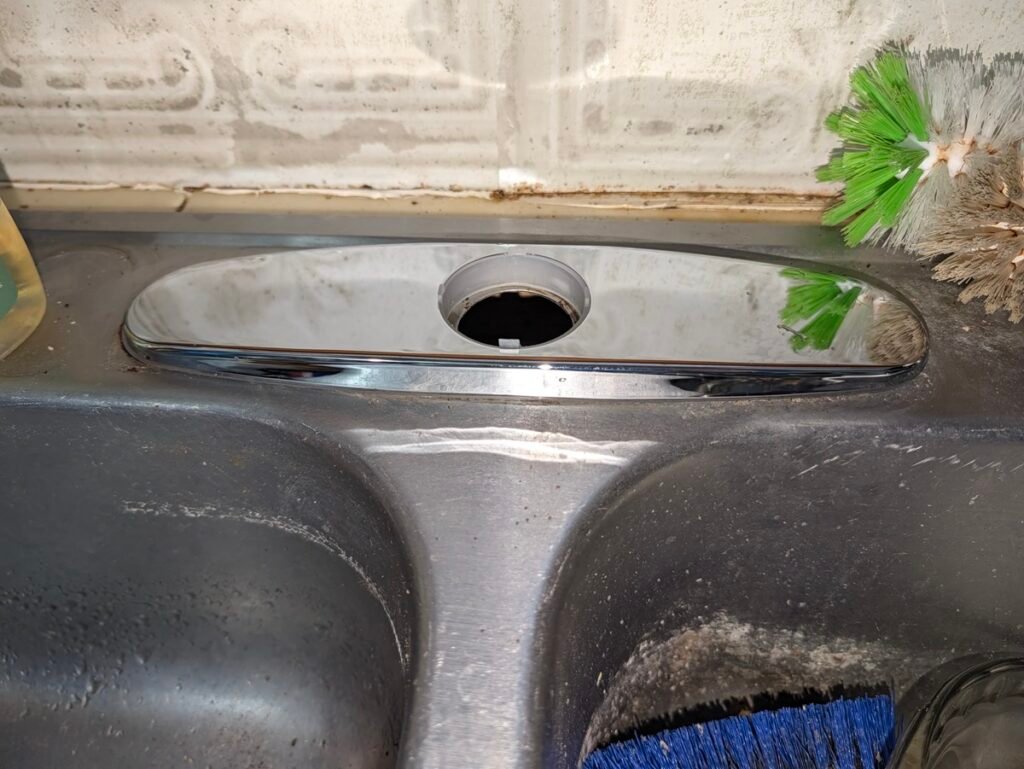
Caption: An escutcheon deck plate cleanly seals the unused outer holes on a three-hole sink deck.
Set the decorative deck plate and its rubber/foam base gasket directly over the center hole. Ensure it covers both outer holes evenly and sits square against the rear backsplash.
Step 4: Drop the New Faucet and Lock the Threaded Shank
Drop your new fixture’s water lines and threaded center post through the escutcheon plate and the center sink hole.
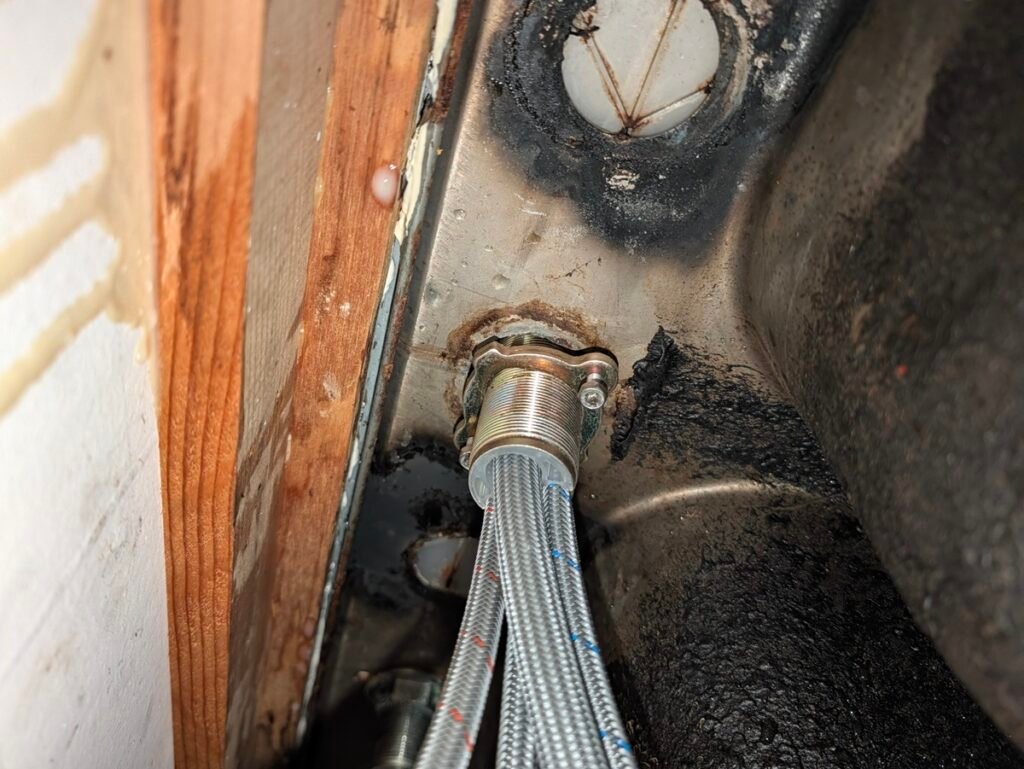
Caption: Slide all flexible lines through the mounting nut first before hand-threading the collar up the brass shank.
- Working inside the cabinet, feed all flexible supply lines and the sprayer hose through the new threaded mounting nut and pressure bracket.
- Slide the nut up to the threaded brass shank on the underside of the sink.
- Hand-tighten the collar until it contacts the underside of the deck.
- Double-check that the faucet handle is aligned properly up top.
- Grab your #2 Phillips screwdriver and evenly tighten the two integrated locking bolts on the collar. These two screws apply mechanical leverage, clamping the standalone faucet rock-solid against the deck without needing a bulky basin wrench.
Step 5: Connect the Sprayer Hose and Retraction Weight
With the faucet body firmly clamped down, hook up the pull-down sprayer:
- Remove any protective shipping caps from the downward faucet tube.
- Push the quick-connect fitting on the sprayer hose onto the faucet outlet until you hear a solid click. Pull down lightly to verify it is locked.
- Attach the lead/counter-weight to the sprayer hose loop. Position it about 6 to 8 inches above the bottom of the hose loop so the spray head pulls smoothly back into the spout without catching on shut-off valves or drain pipes.
Step 6: Hook Up Supply Lines and Check for Leaks
Identify the hot and cold supply lines (marked with red and blue tracer threads on braided lines).
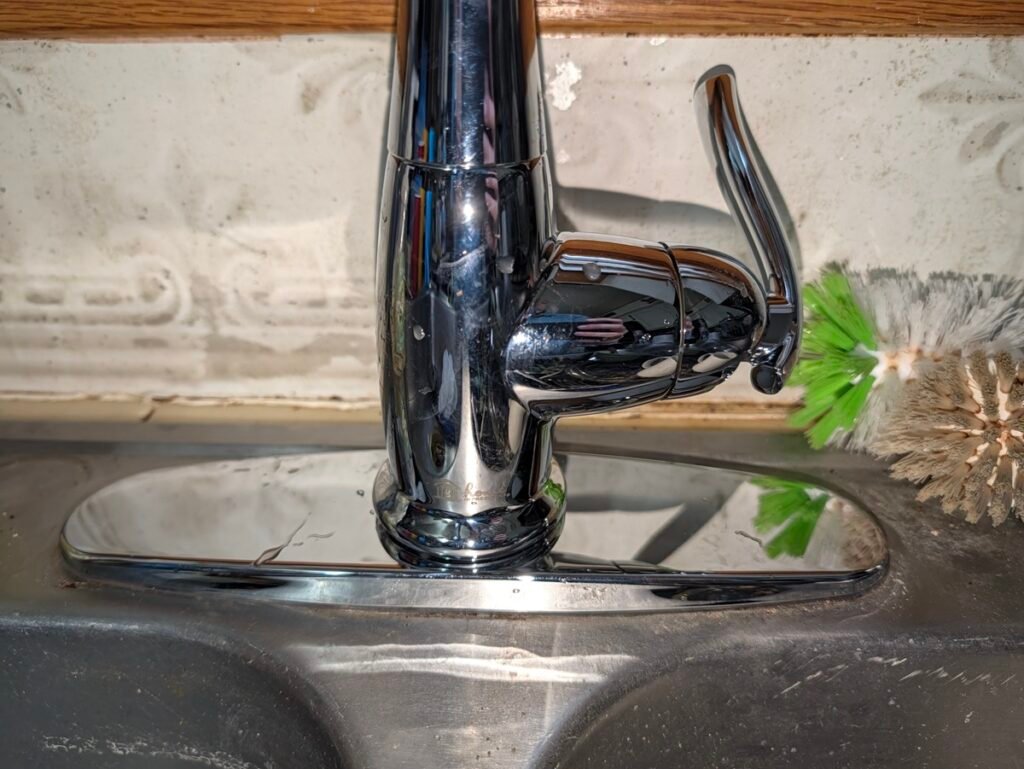
Caption: The finished single-handle faucet seated flush and tested under pressure.
- Thread each line onto its corresponding stop valve.
- Prevent Over-tightening: Because modern braided supply lines feature internal rubber compression gaskets, they do not require thread tape or heavy wrench force. Spin them down hand-tight, then use pliers to give them a 1/4 to 1/2 turn snug. Over-torquing will pinch or slice the rubber gasket, causing slow leaks.
- Slowly open the angle stops and inspect the valve joints with a dry paper towel.
- Turn on the faucet handle, cycle between hot and cold, and check both stream and spray modes to confirm smooth water flow.
Related Plumbing & Kitchen Fixes
- How to Replace a Kitchen Sink Basket Strainer: Eliminate stubborn under-sink leaks with proper putty placement and locknut technique.
- Butcher Block Sink Mounting Guide: How to lock down top-mount clips on thick 1.5-inch wood tops.